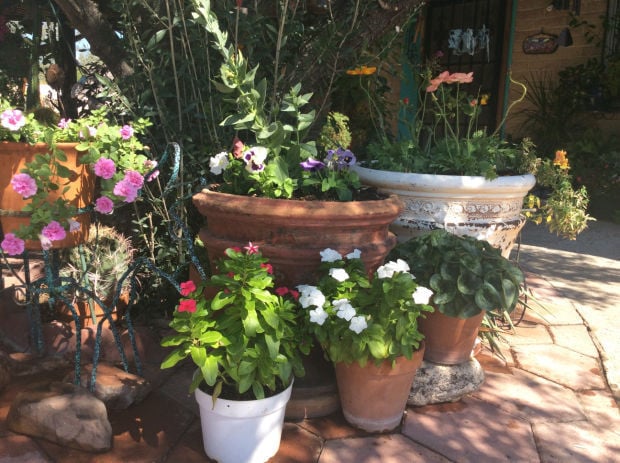
I confess, I enjoy hand-watering some of my plants. Most of my containers are hand-watered. I find the time it takes to water them relaxing, and I take the opportunity to check on my plants and see how they’re doing (yes, I talk to them). This approach works for me, but it may not be practical for everyone. Fortunately there are ways to set up irrigation to your containers so you don’t need to hand water them every few days.
The first thing to remember is that our climate is very hard on container plants. The Pima County Master Gardeners recommend containers that are at least 24 inches in height and diameter as smaller containers will result in overheated, dry roots.
Second, make sure you adjust the watering frequency depending on the type of plant you are growing and consider this when you’re setting up your irrigation system. For example, don’t put non-native plants like citrus or hibiscus on the same watering circuit as your prized exotic cacti. Any containerized non-natives will need watering at least three times per week, while cacti usually do well with watering less than once a week (these are general guidelines of course).
Third, choose the appropriate soil type for your plants. Palms and cacti need different soils in containers than tropical plants, food plants, and the like. Make sure you have a fertilization routine appropriate for the type of plant you are growing, as well. Container plants will use up their food quickly, and regular applications of slow-release natural fertilizers will serve them well. In addition, you will want to flood irrigate your containers about twice a year to wash out the salts that inevitably build up (do this before your fertilization).
Finally, protect your container plants from the harshest aspects of our climate. This means partial shade for many non-native plants (and even native cacti like saguaro), avoiding reflected heat and sun from paved surfaces, shelter from wind and dust, and protection from cold and frost during the winter. Also, mulch your container plants — with the important exception of palms and cacti.
Nurseries and hardware stores sell a variety of kits you can use to quickly set up a DIY irrigation system for your pots. You can also purchase kits online. You can run the irrigation off your regular irrigation system if appropriate; make sure this will not result in too many emitters on one irrigation tubing. Check out my article on irrigation to help you figure this out. You can also hook up the irrigation to a hose bib, in which case you will need a filter, pressure compensator and a backflow prevention device. Many manufacturers sell this as one single kit so you only have one thing to connect.
Parts
- Hose or irrigation connectors (depending on your setup).
- ½ inch irrigation tubing to run the water to the area with your pots.
- ¼ inch microtubing to connect to your ½ inch main irrigation tubing.
- Emitters: You can choose adjustable emitters, where you can turn the cap of the emitter to adjust the flow, or get 1/2-, 1-, 2-, or 5-gallon-per-hour (GPH) emitters. Your emitters may be with or without stakes.
- Optional: Brown drip tubing with pre-drilled holes. Can be used in straight lines for longer beds or connected in a circle for smaller pots.
- Optional: Ollas — unglazed ceramic pots that you can insert into your containers and fill periodically. Ollas are permeable to water, which diffuses out into the soil of the container. These are another option if you don’t want to use emitters and tubing. You can also use irrigation tubing to fill up your ollas periodically. Thrive and Grow Gardens sells kits to set this up, although currently they are out of stock. One down side of ollas is they take up a fair amount of space in your container; I use them only in my very large containers.
- Optional: Timer — you can program inexpensive timers to water your pots automatically if you’re connecting to a hose bib.
Tips
- If you’re connecting your pots to existing irrigation, they should be on a separate circuit from your other plants, since they will need much more frequent watering. This is especially true of veggie containers.
- If you collect rainwater, you may be able to get your irrigation water from your rainwater barrel. Rainwater is the best water for container plants. However, pressure may be an issue.
- Check the duration of your watering by testing different times and checking whether the pot soil is wetted all the way through.
- For a cleaner look, run the microtubing up through the drainage hole in your pot. If your pot is sitting on a hard surface, put it up on little feet so that the pot doesn’t crimp the microtubing. If your pots are on gravel, just remove some gravel around the microtubing. The videos below have great tips on how to make that work.
- Speaking of videos, YouTube is your friend. There are tons of great helpful videos on how to set this up. Watch a couple so that you’re comfortable with the process.
- If you find all of this overwhelming, don’t be afraid to consult some experts. You can ask the Pima County Master Gardeners for help. You can also hire a landscaper to help you out.
Here are some helpful videos to get you started:
- Video: Setting up pot irrigation from a hose. This video has a great overview of all of the parts you will need and how to connect them to minimize leaks. At 18 minutes: using a plant stake to get the tubing through the soil in your pot.
- Video: Setting up irrigation from your existing irrigation system. At 11 minutes: another great method for how to run tubing through the soil in your pot.


